

Sweet and Sour Chicken is one of those universally beloved dishes that transcends generations and cultures. Crispy, golden-fried chicken pieces tossed in a vibrant, glossy sauce that dances between tangy and sweet—every bite is a harmony of texture, flavor, and comfort. It’s both nostalgic and indulgent, reminding us of takeout dinners, family gatherings, or bustling buffets with steaming trays of pineapple-studded goodness.
But this dish is so much more than a fast-food classic. When made from scratch, sweet and sour chicken becomes an experience: a culinary celebration that combines technique with bold ingredients. The crunch of perfectly breaded chicken meets the zing of vinegar, the richness of muscovado sugar, and the tropical burst of pineapple. Throw in some tender onions and crisp bell peppers, and you have a balanced dish that satisfies every part of the palate.
Whether you’re preparing dinner for the family, recreating your favorite restaurant meal, or introducing bold new flavors to your kitchen, this recipe offers a tried-and-true guide to mastering a globally adored favorite—with flair, freshness, and total flavor control.
Origins and Cultural Background
While many associate sweet and sour chicken with American-Chinese takeout menus, its roots dig deeper. The concept of pairing sweet and acidic elements in cooking dates back to ancient China, where vinegar and sugar were often used together in sauces for balance and preservation. This style became especially popular in Cantonese cuisine, where tangcu (vinegar-sugar) sauces were used to coat fried meats.
As Chinese immigrants brought their culinary traditions to Western countries, they adapted recipes based on local palates and ingredient availability. In the United States and Europe, the Cantonese sweet and sour method evolved into what we know today—often with additions like ketchup, brown sugar, and canned pineapple. While this Westernized version might differ from the original, it still honors the yin and yang of sweet versus sour—a foundational principle in Chinese gastronomy.
Today’s version is globally embraced, enjoyed everywhere from London pubs and New York diners to Filipino households and Caribbean kitchens, each putting a local spin on it. Some use tamarind instead of vinegar, others add chili for heat, and some toss in mango or bell peppers. Still, the heart of the dish remains: juicy, crispy chicken bathed in a glossy, sticky, addictive sauce.
Flavor Profile and Texture
The magic of sweet and sour chicken lies in its dramatic contrast.
- The Chicken: Crisp on the outside, tender and juicy inside. The flour-cornstarch-egg coating forms a delicate yet crunchy crust that soaks in just enough sauce without going soggy.
- The Sauce: Sweetness from dark brown sugar and pineapple juice meets the tang of malt vinegar and ketchup, while ginger and garlic add layers of warmth and depth.
- The Veggies: Onions and peppers are cooked just enough to soften slightly but still hold their bite and color, adding texture and brightness to the dish.
- The Pineapple: Juicy chunks add a burst of fruity sweetness, enhancing the complexity of the sauce.
This dish isn’t subtle. It’s bold, loud, sticky, and crunchy—in the best way possible.
Preparation Phase & Tools to Use
Recipe Overview
- Prep Time: 20–25 minutes
- Cook Time: 20–25 minutes
- Total Time: About 45–50 minutes
- Servings: 4 generous portions
- Yield: Enough for a hearty family-style dinner or packed lunches with leftovers
Essential Tools and Equipment
- Wok or large frying pan: Needed for frying the chicken pieces until golden and crispy.
- Second skillet: Ideal for preparing the sauce and tossing the chicken at the end.
- Tongs: For flipping the chicken without breaking the coating.
- Shallow bowls or trays: To organize dredging stations—cornstarch, egg wash, and flour mixture.
- Wooden spoon or silicone spatula: To stir the sauce without scratching your pan.
- Slotted spoon: Helps remove the fried chicken from the oil while leaving excess grease behind.
- Paper towels: For draining fried chicken.
- Meat thermometer (optional but useful): Ensures chicken is cooked safely to 165°F (74°C).
Importance of Each Tool
- Wok: Its deep, concave shape distributes heat evenly and reduces oil splatter.
- Shallow bowls: Organize the dredging process so your coating stays dry and effective.
- Tongs or slotted spoon: Preserve the integrity of your crispy coating during and after frying.
- Separate pans: Prevent the crispy chicken from softening too soon by making the sauce in another pan, then combining at the end.
Preparation Tips
- Use room-temperature eggs for easier coating adhesion.
- Dry your chicken with paper towels before dredging. Excess moisture interferes with crisping.
- Cut chicken into uniform sizes so they cook evenly and finish at the same time.
- Don’t overcrowd the pan during frying. Too many pieces lower the oil temperature and result in soggy coating.
- Let the sauce thicken slightly before combining it with the chicken, so the glaze clings without running off.
Ingredients List
For the Crispy Chicken
- 5 tbsp vegetable oil (for frying)
- 2 eggs, lightly beaten
- 3 tbsp cornflour (cornstarch)
- 90 g (¾ cup) all-purpose flour (plain flour)
- ½ tsp salt
- ½ tsp black pepper
- ½ tsp garlic salt
- 2 tsp paprika
- 3 skinless chicken breast fillets, chopped into bite-size pieces
For the Sweet and Sour Sauce
- 1 tbsp vegetable oil
- 1 large onion, peeled and chopped into large chunks
- 1 red bell pepper, chopped into 1-inch pieces
- 1 green bell pepper, chopped into 1-inch pieces
- 2 cloves garlic, peeled and minced
- 1 tsp minced fresh ginger
- 150 ml (⅔ cup) tomato ketchup
- 2 tbsp malt vinegar
- 6 tbsp dark brown muscovado sugar
- 475 g (17 oz) canned pineapple chunks in juice (do not drain)
To Serve
- Egg-fried rice or boiled rice
- 1 tsp sesame seeds, for garnish
Step-by-Step Instructions
Step 1: Prep the Chicken Coating
Set up three shallow bowls:
- One with cornflour,
- One with beaten egg,
- One with the combined flour, salt, pepper, garlic salt, and paprika.
Dredge each chicken piece first in cornflour, then in the egg wash, and finally in the seasoned flour mix. Press lightly to ensure the coating sticks. Repeat until all chicken pieces are coated.
Step 2: Fry the Chicken
Heat 5 tablespoons of vegetable oil in a wok or large frying pan over high heat. Once shimmering and hot (but not smoking), gently place chicken pieces into the oil, spacing them out.
Fry for 6–7 minutes, turning occasionally, until golden and crispy. You may need to work in batches.
Once cooked, transfer to a plate lined with paper towels to drain.
Step 3: Make the Sauce
While the chicken cooks, heat 1 tablespoon of oil in a large skillet over medium-high heat. Add onion, red bell pepper, and green bell pepper. Stir-fry for 3 minutes until slightly softened.
Add garlic and ginger, sauté for another 1 minute until fragrant.
Pour in the tomato ketchup, vinegar, sugar, and pineapple chunks with juice. Stir to combine.
Bring to a boil, then reduce to simmer for 3–5 minutes until the sauce thickens slightly and becomes glossy.
Step 4: Combine and Finish
Add the crispy chicken to the skillet with the sauce. Toss gently to coat each piece without breaking the crust. Heat for another minute to allow flavors to meld.
Step 5: Plate and Serve
Serve hot over boiled or egg-fried rice. Sprinkle with toasted sesame seeds for a nutty finish. Garnish with optional chopped scallions, chili flakes, or extra pineapple chunks if desired.
Side Dish Recommendations
While Sweet and Sour Chicken is flavorful and filling on its own, pairing it with the right side dishes can bring contrast, balance, and a complete dining experience. Because this dish is a medley of sweet, tangy, and savory flavors, it benefits from sides that either complement or contrast its boldness.
Whether you’re planning a full Asian-inspired dinner spread or simply want to round out a weeknight meal, here are the most delicious and effective sides to serve with sweet and sour chicken.
Egg-Fried Rice
The gold standard pairing. Light, fluffy egg-fried rice complements the richness of the sweet and sour sauce. The egg adds protein and richness, while green onions and peas offer freshness. It’s simple, versatile, and satisfying.
Steamed Jasmine or Basmati Rice
A neutral, fluffy steamed rice acts as a canvas for the bold sauce. The light floral notes of jasmine rice subtly elevate the dish without competing with it.
Stir-Fried Vegetables
Crisp broccoli, snap peas, baby corn, and bok choy stir-fried with garlic and soy sauce offer a crunchy and savory balance. This side adds nutritional value and textural contrast to the meal.
Asian Slaw
A tangy cabbage slaw with rice vinegar, sesame oil, shredded carrots, and scallions provides crunch and acidity to offset the sweetness of the sauce. This side refreshes the palate and cuts through the richness.
Sesame Noodles
Cold sesame noodles or lightly sautéed lo mein tossed in sesame oil, soy sauce, and green onions provide a savory, slightly nutty partner to the chicken’s glaze. The chewy noodles create a textural pairing that feels hearty yet balanced.
Wok-Tossed Garlic Green Beans
Blistered green beans sautéed with garlic and soy sauce add bold umami and earthy undertones to the dish. Their charred edges and slight bitterness pair beautifully with the sweetness of the chicken.
Fried Wontons or Spring Rolls
These crispy, handheld appetizers echo the chicken’s crunch but with different fillings—like shrimp, veggies, or pork—providing variety on the plate. Dip them in sweet chili sauce for an extra flavor layer.
Pickled Cucumbers or Kimchi
Pickled elements provide an acidic, cold, and bright contrast to the warm, sticky chicken. A spoonful of Asian pickled cucumbers or a few bites of kimchi elevate the experience with zing and fermented complexity.
Nutritional Information & Health Benefits
Sweet and Sour Chicken is a high-flavor dish that offers a combination of protein, vegetables, and fruit—but it also includes ingredients like sugar and oil that require balance. When made at home, you have full control over these elements, making it a dish that can be as indulgent or as healthy as you like.
Estimated Nutrition Per Serving (without rice)
- Calories: 480–550 kcal
- Protein: 35–40g
- Fat: 18–22g
- Saturated Fat: 3–5g
- Carbohydrates: 45–55g
- Sugar: 20–25g
- Fiber: 2–3g
- Sodium: 750–950mg
- Cholesterol: 150–180mg
Nutritional Highlights by Ingredient
Chicken Breast
- Lean source of protein
- Low in saturated fat
- Rich in niacin and vitamin B6
Pineapple
- Contains bromelain, a digestive enzyme
- Rich in vitamin C and manganese
- Naturally sweetens the dish
Bell Peppers and Onion
- High in vitamin C, antioxidants, and fiber
- Add crunch and bulk without many calories
Garlic and Ginger
- Anti-inflammatory properties
- Aid digestion and boost immune response
Tomato Ketchup and Brown Sugar
- Provide deep color and sweetness
- Should be measured to balance the nutritional profile
Vegetable Oil
- Essential for frying but can be absorbed by the coating
- Opt for high-smoke-point oils like canola or peanut oil
Tips to Make It Healthier
- Air-fry or bake the chicken instead of deep frying.
- Use low-sodium ketchup and vinegar to reduce salt.
- Replace some sugar with natural sweeteners like honey or pineapple juice concentrate.
- Increase vegetables in the sauce for more fiber and vitamins.
- Serve with brown rice or cauliflower rice for a lighter option.
Common Mistakes to Avoid & How to Master It
Even though sweet and sour chicken seems simple, there are a few common pitfalls that can affect texture, flavor, and overall satisfaction. Below are some of the most frequent mistakes people make, and expert tips to help you get it right every time.
Mistake 1: Chicken Coating Doesn’t Stick
Why it happens: Chicken pieces were too wet or dredging steps were rushed.
Fix: Pat chicken dry thoroughly. Stick to the dredging sequence: cornflour → egg wash → seasoned flour. Press gently to adhere.
Mistake 2: Soggy Chicken After Tossing in Sauce
Why it happens: The sauce is too watery or chicken sits too long in the pan after tossing.
Fix: Reduce the sauce until slightly thickened before adding chicken. Toss only just before serving and serve immediately.
Mistake 3: Overcrowding the Pan During Frying
Why it happens: Too many pieces lower the oil’s temperature, resulting in soggy and unevenly cooked chicken.
Fix: Work in batches. Let oil return to proper temperature between rounds.
Mistake 4: Uneven Chicken Cooking
Why it happens: Chicken pieces are different sizes or too large.
Fix: Cut chicken into uniform, bite-sized chunks. Check doneness by slicing a piece—it should be white throughout, not pink.
Mistake 5: Sauce Too Thin
Why it happens: Pineapple juice or other liquids weren’t reduced properly.
Fix: Simmer the sauce on medium heat for a few minutes. The sugar will naturally thicken it as it reduces.
Mistake 6: Sauce Overpoweringly Sweet or Tangy
Why it happens: Imbalance between vinegar and sugar.
Fix: Taste as you go. If it’s too tangy, add a spoon of brown sugar. If too sweet, splash in more vinegar or lemon juice.
Mistake 7: Overcooking the Vegetables
Why it happens: Bell peppers and onions were added too early or cooked too long.
Fix: Sauté veggies just 2–3 minutes to maintain color and crunch.
Mistake 8: Using Cold Chicken from the Fridge
Why it happens: Cold chicken brings down oil temperature, affecting the crispness.
Fix: Let chicken sit at room temperature for 10–15 minutes before cooking.
Mistake 9: Not Draining the Chicken
Why it happens: Fried chicken sits in oil, soaking it back in.
Fix: Use a slotted spoon to transfer chicken to paper towels immediately after frying.
Mistake 10: Not Prepping Sauce Ingredients First
Why it happens: The sauce cooks quickly, and delays can lead to burning or imbalance.
Fix: Prep all ingredients before turning on the heat. This keeps the cooking process smooth and fast.
Pro Tips, Notes & Finishing Touches
The difference between a good sweet and sour chicken and a truly unforgettable one lies in the details. These final tips will help you deliver a crisp, flavorful, and beautifully balanced dish every single time.
Use Fresh Pineapple Juice (Optional Upgrade)
If you’re looking to elevate your sauce, replace the canned juice with fresh pineapple juice. It adds brighter, cleaner flavor without as much syrupy sweetness. The tang from fresh juice also brings out more of the natural sharpness in the vinegar and tomato base.
Toast the Sesame Seeds
Don’t skip toasting the sesame seeds before garnishing. Just a minute or two in a dry pan over medium heat intensifies their nutty aroma and adds a deeper layer of flavor that complements the sticky sauce.
Add a Dash of Soy Sauce for Umami
A small splash of soy sauce in the sauce—just ½ to 1 teaspoon—adds savory depth and balances the sweetness. It’s not traditional in all versions, but it enhances complexity.
Crisp Up Chicken in the Air Fryer (for Leftovers)
To revive leftover chicken pieces, use an air fryer at 375°F for 5–6 minutes to bring back some crunch without deep-frying again. Toss in sauce just before serving to preserve texture.
Fresh Garnishes for Contrast
Top your dish with fresh chopped scallions, cilantro, or even a few red chili slices. These bright, crisp toppings offer contrast in flavor and color.
Serve Sauce on the Side (for Meal Prep)
If you’re preparing sweet and sour chicken in advance for meal prep or packed lunches, keep the sauce and chicken separate. Reheat and combine just before serving to prevent sogginess.
Storage & Reheating Instructions
Like many saucy dishes, sweet and sour chicken can be stored and reheated—but care must be taken to preserve its best qualities, especially the crispness of the chicken and the flavor of the sauce.
How to Store
- Let the dish cool completely before transferring to containers.
- Store chicken and sauce separately for best results.
- Refrigerate in airtight containers for up to 3 days.
- Do not freeze once coated and sauced—the texture will break down.
How to Reheat
Stovetop (Recommended)
- Reheat the chicken in a dry skillet or lightly oiled pan to crisp the edges.
- Warm the sauce in a separate saucepan or add to the skillet after chicken is heated.
- Stir together and heat until bubbling.
Air Fryer (For Chicken Only)
- Reheat chicken at 375°F for 5–6 minutes.
- Reheat sauce on stovetop or microwave and pour over before serving.
Microwave
- Place the chicken and sauce in a microwave-safe dish.
- Cover loosely and heat in 30-second intervals, stirring between, until hot.
- Texture may be softer than original.
Frequently Asked Questions (FAQs)
Can I use chicken thighs instead of breasts?
Yes. Chicken thighs add more moisture and richness and are slightly more forgiving if overcooked. Boneless, skinless thighs work best. Be sure to cut them into equal-sized pieces for even cooking.
Is this dish spicy?
No, the base recipe is not spicy. However, you can add chopped chili peppers, sriracha, or chili flakes to the sauce or as a garnish if you prefer a kick.
Can I bake the chicken instead of frying?
Yes. Coat the chicken the same way, then place on a lined baking sheet and spray with oil. Bake at 425°F (220°C) for 20–25 minutes, flipping halfway. The texture won’t be as crispy, but it’s a great healthier option.
Can I make this gluten-free?
Yes. Use a gluten-free flour blend in place of all-purpose flour and ensure your cornstarch, soy sauce (if added), and ketchup are certified gluten-free.
What other vegetables can I use?
Besides onions and peppers, you can add snow peas, broccoli, or even julienned carrots. Just be mindful of cooking times—firmer veggies should be added earlier, and softer ones later.
Can I use fresh pineapple instead of canned?
Absolutely. Just make sure to use juice from the fresh pineapple or supplement with a small amount of store-bought unsweetened pineapple juice. You’ll get a brighter, fresher flavor.
How long can it sit out before serving?
Sweet and sour chicken is best served immediately but can sit out at room temperature for up to 1 hour. After that, it should be refrigerated and reheated.
Can I double the sauce?
Yes. If you prefer a saucier dish, you can easily double the sauce ingredients. Just make sure to simmer it longer to allow the flavors to concentrate and thicken.
Conclusion
Sweet and Sour Chicken is a dish that brings people together. Its balance of sweet, sour, savory, and crispy textures makes it a standout meal that appeals to all ages and tastes. While it might be seen as a takeout staple, making it at home unlocks a new level of freshness and satisfaction.
With this recipe, you’re not just tossing together pantry staples. You’re recreating an iconic dish that’s rooted in tradition, adapted for convenience, and elevated through technique. The combination of juicy chicken, bright sauce, and tender-crisp vegetables will have your kitchen filled with aromas that rival your favorite restaurant.
Make it once, and it’s guaranteed to become a regular in your rotation—perfect for weeknights, meal prep, casual gatherings, or special occasions. Whether served over rice, noodles, or straight from the skillet, every bite promises comfort and crave-worthy flavor.
Print
Sweet and Sour Chicken
- Total Time: 45–50 minutes
- Yield: 4 servings 1x
Description
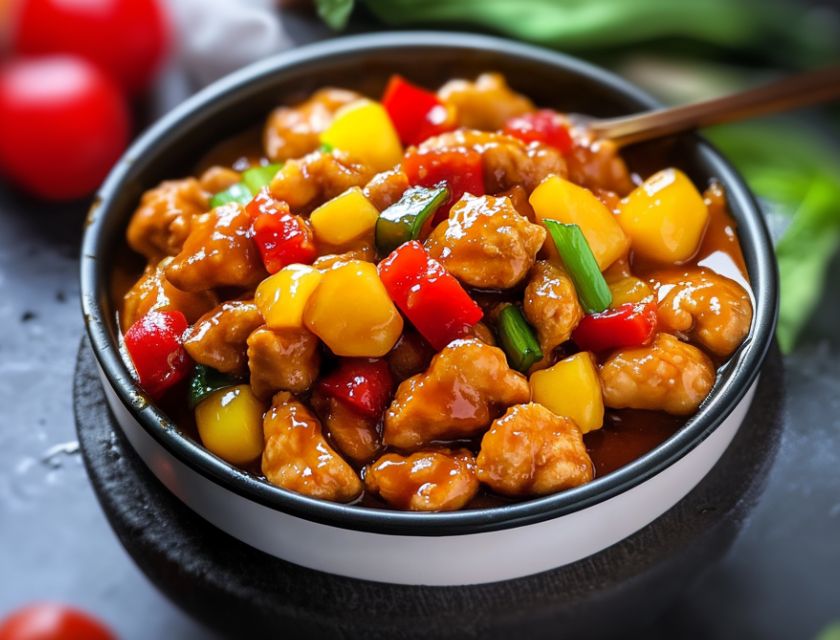
Crispy, golden chicken tossed in a sticky, tangy, and sweet sauce with bell peppers, pineapple, and aromatic ginger and garlic. A better-than-takeout favorite made from scratch.
Ingredients
For the Chicken
-
5 tbsp vegetable oil (for frying)
-
2 eggs, lightly beaten
-
3 tbsp cornstarch
-
¾ cup (90 g) all-purpose flour
-
½ tsp salt
-
½ tsp black pepper
-
½ tsp garlic salt
-
2 tsp paprika
-
3 boneless, skinless chicken breasts, cut into bite-size chunks
For the Sauce
-
1 tbsp vegetable oil
-
1 large onion, chopped
-
1 red bell pepper, chopped
-
1 green bell pepper, chopped
-
2 cloves garlic, minced
-
1 tsp minced ginger
-
⅔ cup (150 ml) tomato ketchup
-
2 tbsp malt vinegar
-
6 tbsp dark brown muscovado sugar
-
1 can (17 oz / 475 g) pineapple chunks in juice
To Serve
-
Cooked boiled rice or egg-fried rice
-
1 tsp sesame seeds, toasted
Instructions
-
Set up three bowls for coating: one with cornstarch, one with beaten eggs, and one with flour mixed with salt, pepper, garlic salt, and paprika.
-
Dredge chicken in cornstarch, then egg, then flour mixture. Press lightly to coat well.
-
Heat vegetable oil in a wok or large frying pan. Fry chicken in batches for 6–7 minutes until golden and cooked through.
-
Transfer cooked chicken to a plate lined with paper towels.
-
In a second skillet, heat 1 tbsp oil. Add onion and bell peppers. Cook for 3 minutes until slightly softened.
-
Add garlic and ginger. Cook for 1 more minute.
-
Stir in ketchup, vinegar, sugar, and pineapple (with juice). Bring to a boil, then reduce to a simmer for 3–5 minutes until thickened.
-
Add the cooked chicken to the sauce. Toss to coat and heat for 1–2 minutes.
-
Serve immediately over rice. Garnish with sesame seeds.
Notes
-
Fry chicken in small batches to maintain oil temperature and crispiness.
-
Add chili or hot sauce to the sauce for a spicier version.
-
For leftovers, keep sauce and chicken separate to preserve crispness.
-
Use chicken thighs for a juicier variation.
-
To reduce sweetness, cut sugar by 1–2 tablespoons or use unsweetened pineapple juice.
- Prep Time: 25 minutes
- Cook Time: 20–25 minutes
- Category: Main Dish
- Method: Stir-Fry / Deep Fry
- Cuisine: American Chinese
Nutrition
- Calories: 520
- Sugar: 48g
- Sodium: 850mg
- Fat: 20g
- Saturated Fat: 4g
- Carbohydrates: 48g
- Fiber: 2g
- Protein: 38g
- Cholesterol: 175mg
Leave a Comment