
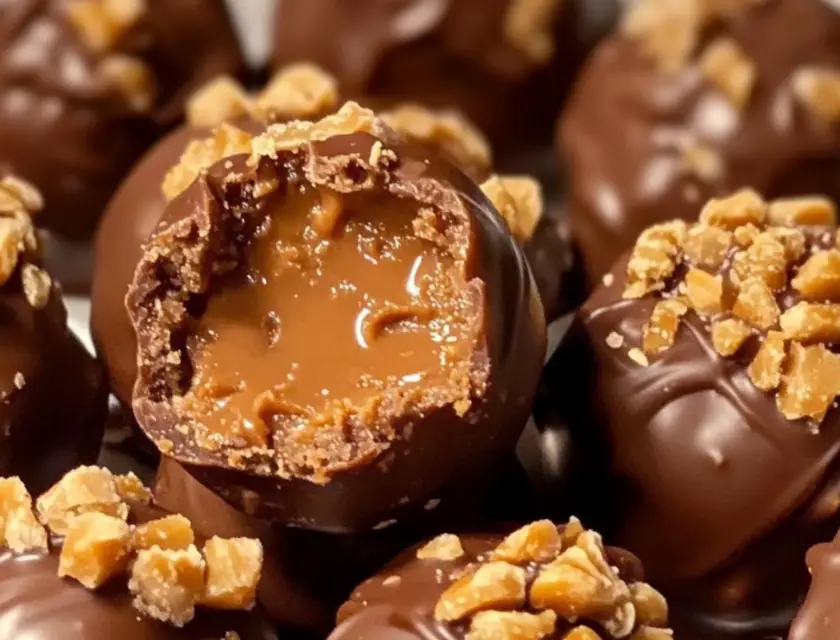
Luxurious Butterfinger Balls are an irresistible treat that brings together the crunch of Butterfinger candy bars with the creaminess of peanut butter and the richness of a smooth chocolate coating. Perfect for holidays, parties, or just an indulgent snack, these no-bake bite-sized treats are both easy to make and utterly decadent.
Combining two beloved flavors—chocolate and peanut butter—these balls pack a delightful contrast of textures. Crushed Butterfinger bars provide a crisp, toffee-like crunch, while the creamy peanut butter mixture holds everything together. A thick coating of melted chocolate wraps around each ball, giving the dessert a luxurious finish that feels like something you’d buy from a high-end confectioner.
What’s even better? This recipe requires no baking. In just a few simple steps, you can create a dessert that will impress family and friends without spending hours in the kitchen. Whether you’re preparing for a festive occasion or simply want to satisfy a sweet tooth, Butterfinger Balls are the perfect go-to treat.
Overview of Butterfinger Balls
Butterfinger Balls are made with crushed Butterfinger candy bars, peanut butter, powdered sugar, and a chocolate coating. These ingredients come together to form a rich, creamy center that is enhanced by the crunch of the Butterfinger pieces, offering an indulgent bite of both texture and flavor. The smooth chocolate coating gives the balls a professional, polished appearance, while the interior remains soft and sweet with a hint of that signature Butterfinger crunch.
This dessert is a crowd-pleaser for both kids and adults. For kids, they’re fun to eat and even more fun to help make—rolling the peanut butter mixture into balls is an easy task that little hands will enjoy. For adults, these treats bring a nostalgic touch, reminding them of the classic candy bars they grew up with, but with an added touch of elegance.
These bite-sized treats are also incredibly versatile. While the recipe calls for a classic milk or semisweet chocolate coating, you can switch it up by using dark chocolate, white chocolate, or even adding a drizzle of caramel or white chocolate on top for extra flair. You can also customize the toppings with sprinkles, nuts, or more crushed Butterfinger pieces.
Butterfinger Balls can be stored for weeks in the refrigerator, making them great for meal prep or keeping on hand for unexpected guests or late-night cravings. They’re also perfect for gifting during the holidays—place them in a decorative box or tin, and you have a homemade gift that feels special and luxurious.
Brief History and Popularity of Butterfinger in Desserts
The Butterfinger candy bar, introduced in 1923 by the Curtiss Candy Company, quickly became a beloved American classic. Known for its crispy, peanut butter-flavored center coated in chocolate, Butterfinger has long been a favorite of candy lovers across the country. Its unique crunchy texture, combined with its rich peanut butter flavor, sets it apart from other chocolate bars and makes it a versatile ingredient in desserts.
Over the years, Butterfinger has found its way into numerous dessert recipes, from pies to cakes and ice cream sundaes. The candy’s distinctive crispy layers and bold flavor have made it a popular choice for adding texture and taste to all kinds of sweet treats. The rise of no-bake desserts has particularly showcased Butterfinger’s potential, as the candy bar’s crunchy texture remains intact without the need for baking, providing a perfect contrast to creamy, rich fillings like peanut butter.
In recent years, no-bake treats like Butterfinger Balls have gained even more popularity. Busy schedules and a desire for easy, quick-to-make desserts have contributed to the rise of these simple yet indulgent treats. Combining a few ingredients with minimal prep time, recipes like Butterfinger Balls offer maximum flavor with minimal effort, making them a go-to option for dessert lovers of all ages.
Preparation Phase & Tools to Use
Prep Time:
- 10-15 minutes
Chill Time:
- 1 hour
Total Time:
- 1 hour 15 minutes
Servings:
- 24-30 balls (depending on size)
Yield:
- About 2-3 dozen Butterfinger Balls
Essential Tools and Equipment
Before you start making Butterfinger Balls, gather the following tools to streamline the process:
1. Mixing Bowls
- You’ll need at least one large mixing bowl for combining the peanut butter and crushed Butterfinger bars, and a smaller one for melting the chocolate.
2. Food Processor (Optional)
- While not required, a food processor is useful for crushing the Butterfinger candy bars into fine crumbs quickly. Alternatively, you can crush them using a plastic bag and a rolling pin for a coarser texture.
3. Cookie Scoop or Spoon
- A small cookie scoop or spoon is helpful for portioning out the peanut butter mixture into evenly-sized balls. Using a cookie scoop ensures consistent ball sizes, which helps them chill and coat evenly.
4. Baking Sheet
- Line a baking sheet with parchment paper or wax paper to place the formed balls while chilling and later dipping them in chocolate. The lined sheet helps prevent sticking and makes for easy cleanup.
5. Double Boiler or Microwave-Safe Bowl
- Use a double boiler to melt the chocolate coating slowly, or use a microwave-safe bowl if you prefer to melt the chocolate in the microwave in 30-second intervals. Be careful not to overheat the chocolate.
6. Forks or Dipping Tools
- A fork or candy dipping tool will make it easier to dip the chilled balls into melted chocolate, allowing excess chocolate to drip off and ensuring the balls are evenly coated.
Preparation Tips
1. Crushing the Butterfinger Candy Bars
- For finer crumbs, pulse the Butterfinger candy bars in a food processor until they are roughly the consistency of coarse crumbs. If you prefer larger chunks, place the bars in a zip-top bag and crush them with a rolling pin. The key is to have a mix of fine crumbs and larger pieces for the best texture.
2. Peanut Butter Consistency
- Use creamy peanut butter for a smooth, even texture in the balls. Natural peanut butter can be used, but make sure it’s well-stirred, as its oil separation can affect the consistency of the mixture.
3. Chill the Balls Before Dipping
- After rolling the peanut butter mixture into balls, it’s essential to chill them in the refrigerator for at least 1 hour. This helps them firm up, making it easier to dip them in melted chocolate without breaking apart.
4. Melting Chocolate
- For a smooth chocolate coating, melt your chocolate slowly. If using the microwave, heat the chocolate chips in 30-second intervals, stirring in between to avoid burning. If the melted chocolate is too thick, add 1 tablespoon of vegetable oil or coconut oil to make it thinner and easier to work with. This will also give the coating a glossy finish.
5. Dipping Tips
- Use forks or a candy-dipping tool to dip the chilled Butterfinger balls into the melted chocolate. Lift the ball out of the chocolate, tapping the fork gently on the side of the bowl to let any excess chocolate drip off. Place the dipped balls back on the parchment-lined baking sheet, ensuring they are spaced out to avoid sticking.
Ingredients List
For the Butterfinger Balls:
- 2 cups crushed Butterfinger candy bars (about 8 full-size bars)
- 1 ½ cups creamy peanut butter
- 2 cups powdered sugar
- 2 tablespoons unsalted butter, softened
For the Chocolate Coating:
- 2 cups semisweet or milk chocolate chips (or a mix of both)
- 1 tablespoon vegetable oil (or coconut oil, optional for smoother chocolate melting)
Optional Toppings:
- Sprinkles
- Crushed Butterfinger pieces
- White chocolate drizzle
Step-by-Step Instructions
Step 1: Crush the Butterfinger Bars
- Start by placing 8 Butterfinger candy bars into a food processor and pulse them until they break into small, crumbly pieces. Alternatively, place the bars in a resealable plastic bag and crush them using a rolling pin until they reach a coarse texture with some fine crumbs.
Step 2: Make the Peanut Butter Mixture
- In a large mixing bowl, combine 1 ½ cups creamy peanut butter, 2 cups powdered sugar, and 2 tablespoons softened unsalted butter. Mix these ingredients together until smooth and well-combined. You want the mixture to be thick and hold together easily.
- Once combined, add the crushed Butterfinger candy bars into the peanut butter mixture. Stir or fold the crushed Butterfinger into the peanut butter mixture until evenly distributed.
Step 3: Form the Balls
- Using a small cookie scoop or spoon, portion out the peanut butter mixture into about 1-inch balls. Roll each portion between your palms to create smooth, even-sized balls.
- Place the formed balls onto a parchment-lined baking sheet. Make sure they are spaced slightly apart to prevent sticking.
- Once all the balls are formed, place the baking sheet in the refrigerator and chill the balls for at least 1 hour to firm up. Chilling ensures the balls hold their shape during dipping.
Step 4: Melt the Chocolate
- While the balls are chilling, melt the 2 cups of semisweet or milk chocolate chips using either a double boiler or the microwave.
- Double Boiler Method: Place the chocolate chips in a heatproof bowl set over a pot of simmering water. Stir the chocolate constantly until melted and smooth.
- Microwave Method: Microwave the chocolate chips in a microwave-safe bowl in 30-second intervals, stirring after each interval until the chocolate is fully melted and smooth.
- If the melted chocolate is too thick, stir in 1 tablespoon of vegetable oil or coconut oil to thin it out and give it a glossy finish.
Step 5: Dip the Balls in Chocolate
- After the Butterfinger balls have chilled and firmed up, use a fork or dipping tool to dip each ball into the melted chocolate, ensuring it is fully coated.
- Allow any excess chocolate to drip off before placing the dipped ball back onto the parchment-lined baking sheet. Repeat this process for each ball.
- For added decoration, sprinkle crushed Butterfinger pieces, sprinkles, or crushed nuts on top of the dipped balls before the chocolate sets. You can also drizzle some melted white chocolate over the tops for an extra decorative touch.
Step 6: Chill and Serve
- Once all the balls have been dipped and decorated, return the baking sheet to the refrigerator and chill the Butterfinger balls for 20-30 minutes or until the chocolate is fully set.
- Serve the Butterfinger Balls chilled or at room temperature. They can be stored in the refrigerator for up to 2 weeks, or you can freeze them for longer storage.
Nutritional Information & Health Benefits
Nutritional Breakdown (per serving, based on 30 servings)
- Calories: 140-160
- Total Fat: 8-10g
- Saturated Fat: 4-5g
- Carbohydrates: 17-19g
- Sugar: 12-15g
- Protein: 2-3g
- Fiber: 1g
- Sodium: 100-120mg
These bite-sized Butterfinger Balls are rich and indulgent, providing a satisfying blend of sweetness and crunch. While they’re an occasional treat, they offer some health benefits due to key ingredients like peanut butter.
Health Benefits of Key Ingredients
1. Peanut Butter
- Good Source of Protein: Peanut butter is rich in protein, which helps with muscle repair, tissue growth, and overall energy. Including protein in desserts can help you feel more satisfied and prevent overindulgence.
- Healthy Fats: Peanut butter is packed with heart-healthy monounsaturated fats, which can help reduce bad cholesterol levels, lowering the risk of heart disease.
- Vitamins and Minerals: Peanut butter is also a source of important nutrients such as Vitamin E, magnesium, and potassium, all of which support bone health, nerve function, and muscle relaxation.
2. Butterfinger Candy Bars
- Indulgent Flavor: While Butterfinger candy bars are primarily known for their crispy peanut butter core and sweet chocolate coating, they add a special crunch to these treats. Moderation is key, as Butterfinger bars are high in sugar and provide a fun, occasional indulgence.
3. Chocolate
- Mood Enhancer: Chocolate, especially dark chocolate, is known for its mood-boosting properties thanks to compounds like theobromine and serotonin. Even the sweeter varieties of chocolate offer this comfort.
- Antioxidants in Chocolate: While semisweet or milk chocolate is used in this recipe, chocolate contains flavonoids, which are antioxidants that help reduce inflammation and protect the heart.
Side Dish and Topping Recommendations
While Luxurious Butterfinger Balls are delicious on their own, you can elevate them further by pairing them with complementary sides or adding toppings to make them even more special.
1. Sprinkles and Crushed Toppings
- Add a playful element to these treats by topping the dipped balls with sprinkles, chopped nuts, or extra crushed Butterfinger pieces before the chocolate sets. Not only do these toppings add a pop of color and texture, but they also make the dessert more visually appealing for parties and gatherings.
2. White Chocolate Drizzle
- For an elegant touch, drizzle melted white chocolate over the top of the Butterfinger Balls after the chocolate coating has set. The contrast between the dark or milk chocolate coating and the white chocolate drizzle adds sophistication and extra sweetness.
3. Pair with Ice Cream
- Serve the Butterfinger Balls alongside a scoop of vanilla or chocolate ice cream. The cold creaminess of the ice cream complements the crunchy texture and richness of the balls, creating a well-balanced dessert that’s both cool and indulgent.
4. Hot Chocolate or Coffee Pairing
- Pair the Butterfinger Balls with a warm cup of coffee, hot chocolate, or espresso. The combination of a warm drink and a sweet, crunchy treat is ideal for cozy evenings or as an after-dinner dessert.
5. Caramel or Nut Toppings
- To make these treats even more decadent, drizzle them with caramel sauce or top with chopped roasted nuts (such as pecans or almonds). These toppings add richness and complement the peanut butter and chocolate flavors.
6. Serve with Fresh Fruit
- If you’re looking for a way to balance the sweetness, pair the Butterfinger Balls with fresh berries such as strawberries, raspberries, or blackberries. The natural tartness of the fruit provides a refreshing contrast to the richness of the dessert.
Recipe Variations
If you’d like to modify the recipe to suit dietary preferences or experiment with different flavors, here are some ideas:
1. Gluten-Free Option
- Most Butterfinger candy bars are gluten-free, making this recipe naturally adaptable for those who avoid gluten. Double-check the ingredient labels, but you can enjoy these without making significant changes to the original recipe.
2. Healthier Option
- For a lighter version, use natural peanut butter (which has no added sugars or oils) and dark chocolate instead of semisweet or milk chocolate. You can also reduce the powdered sugar by about 25% to cut down on sweetness without compromising the texture.
3. Vegan Butterfinger Balls
- Use vegan chocolate chips and swap out the Butterfinger bars for a vegan alternative like Chick-O-Stick or a similar candy with a crunchy, peanut butter center. Replace the butter with vegan margarine or coconut oil for a fully plant-based treat.
4. Almond Butter Variation
- For a slightly different flavor, substitute almond butter for peanut butter. Almond butter adds a more subtle nutty taste, but it pairs just as well with the Butterfinger pieces and chocolate coating.
Frequently Asked Questions (FAQs)
Q1: Can I make Butterfinger Balls ahead of time?
Yes! Butterfinger Balls are a great make-ahead dessert. You can prepare them up to 2 weeks in advance and store them in the refrigerator or freezer. This makes them perfect for holiday prep, parties, or just having a quick sweet treat on hand.
Q2: How do I store Butterfinger Balls?
To store Butterfinger Balls:
- Place them in an airtight container and store in the refrigerator for up to 2 weeks. Make sure to layer them with parchment paper to avoid sticking.
- If you want to keep them for longer, you can freeze them for up to 3 months. Freeze them in a single layer on a baking sheet first, then transfer them to a freezer-safe container to avoid sticking.
Q3: How do I freeze and thaw Butterfinger Balls?
- Freezing: After making the Butterfinger Balls, place them in a single layer on a parchment-lined baking sheet and freeze for about 1 hour. Once they’re frozen, transfer them to a freezer-safe container or zip-top bag. They will last for up to 3 months.
- Thawing: To thaw, place the balls in the refrigerator overnight or for a few hours. You can also eat them straight from the freezer, but allow a few minutes for the texture to soften slightly.
Q4: Can I use a different type of candy bar?
Absolutely! While Butterfinger bars give these treats their signature flavor and crunch, you can swap them out for your favorite candy bars. Heath, Crunch, or Kit Kat bars would all work well, though the flavor and texture will differ slightly.
Q5: Can I make Butterfinger Balls without peanut butter?
Yes, you can substitute the peanut butter with another nut butter, like almond butter or cashew butter, for a slightly different flavor. If you need a nut-free option, consider using sunflower seed butter. Keep in mind that the flavor and texture may vary slightly depending on the type of butter you use.
Storage and Reheating Tips
1. Refrigeration
- Store Butterfinger Balls in an airtight container and refrigerate for up to 2 weeks. For best results, layer them between sheets of parchment or wax paper to prevent them from sticking together.
2. Freezing
- For longer storage, freeze the Butterfinger Balls. Place them in a single layer on a parchment-lined baking sheet and freeze for about 1 hour. Once frozen, transfer them to a freezer-safe container or bag, layering with parchment paper. They will keep in the freezer for up to 3 months.
3. Serving After Freezing
- When you’re ready to enjoy the frozen Butterfinger Balls, simply remove them from the freezer and allow them to thaw in the refrigerator for a few hours. If you’re in a rush, you can let them sit at room temperature for about 10-15 minutes to soften up before serving.
Conclusion
Luxurious Butterfinger Balls are the perfect no-bake dessert for those who crave a sweet and crunchy treat that’s easy to make and share. Combining the bold flavor and crispy texture of Butterfinger candy bars with creamy peanut butter and a smooth chocolate coating, these bite-sized treats are irresistible and fun for all ages.
Whether you’re making them for a party, holiday gathering, or just as a quick weeknight treat, Butterfinger Balls offer a delicious mix of textures and flavors in every bite. They store well and can be made ahead of time, making them a convenient option for meal prep or last-minute dessert needs.
Customize them with sprinkles, crushed candy, or a drizzle of white chocolate for a festive touch. No matter how you serve them, Butterfinger Balls are sure to be a hit with family and friends. With minimal prep time and no need for baking, this dessert strikes the perfect balance between indulgence and simplicity.
Print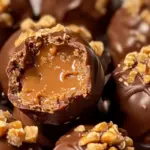
Luxurious Butterfinger Balls
Description
Luxurious Butterfinger Balls combine creamy peanut butter, crushed Butterfinger candy bars, and a rich chocolate coating. Perfect for parties, holidays, or as an easy no-bake treat!
Ingredients
Ingredients List
For the Butterfinger Balls:
- 2 cups crushed Butterfinger candy bars (about 8 full-size bars)
- 1 ½ cups creamy peanut butter
- 2 cups powdered sugar
- 2 tablespoons unsalted butter, softened
For the Chocolate Coating:
- 2 cups semisweet or milk chocolate chips (or a mix of both)
- 1 tablespoon vegetable oil (or coconut oil, optional for smoother chocolate melting)
Optional Toppings:
- Sprinkles
- Crushed Butterfinger pieces
- White chocolate drizzle
Instructions
Step-by-Step Instructions
Step 1: Crush the Butterfinger Bars
- Start by placing 8 Butterfinger candy bars into a food processor and pulse them until they break into small, crumbly pieces. Alternatively, place the bars in a resealable plastic bag and crush them using a rolling pin until they reach a coarse texture with some fine crumbs.
Step 2: Make the Peanut Butter Mixture
- In a large mixing bowl, combine 1 ½ cups creamy peanut butter, 2 cups powdered sugar, and 2 tablespoons softened unsalted butter. Mix these ingredients together until smooth and well-combined. You want the mixture to be thick and hold together easily.
- Once combined, add the crushed Butterfinger candy bars into the peanut butter mixture. Stir or fold the crushed Butterfinger into the peanut butter mixture until evenly distributed.
Step 3: Form the Balls
- Using a small cookie scoop or spoon, portion out the peanut butter mixture into about 1-inch balls. Roll each portion between your palms to create smooth, even-sized balls.
- Place the formed balls onto a parchment-lined baking sheet. Make sure they are spaced slightly apart to prevent sticking.
- Once all the balls are formed, place the baking sheet in the refrigerator and chill the balls for at least 1 hour to firm up. Chilling ensures the balls hold their shape during dipping.
Step 4: Melt the Chocolate
- While the balls are chilling, melt the 2 cups of semisweet or milk chocolate chips using either a double boiler or the microwave.
- Double Boiler Method: Place the chocolate chips in a heatproof bowl set over a pot of simmering water. Stir the chocolate constantly until melted and smooth.
- Microwave Method: Microwave the chocolate chips in a microwave-safe bowl in 30-second intervals, stirring after each interval until the chocolate is fully melted and smooth.
- If the melted chocolate is too thick, stir in 1 tablespoon of vegetable oil or coconut oil to thin it out and give it a glossy finish.
Step 5: Dip the Balls in Chocolate
- After the Butterfinger balls have chilled and firmed up, use a fork or dipping tool to dip each ball into the melted chocolate, ensuring it is fully coated.
- Allow any excess chocolate to drip off before placing the dipped ball back onto the parchment-lined baking sheet. Repeat this process for each ball.
- For added decoration, sprinkle crushed Butterfinger pieces, sprinkles, or crushed nuts on top of the dipped balls before the chocolate sets. You can also drizzle some melted white chocolate over the tops for an extra decorative touch.
Step 6: Chill and Serve
- Once all the balls have been dipped and decorated, return the baking sheet to the refrigerator and chill the Butterfinger balls for 20-30 minutes or until the chocolate is fully set.
- Serve the Butterfinger Balls chilled or at room temperature. They can be stored in the refrigerator for up to 2 weeks, or you can freeze them for longer storage.